Write a UAT test case(Coming soon)
UAT Overview
The UAT framework can be applied to carrying out integration tests. With this framework, we can test specific game features, such as AI navigation, collision detection, and the weapon system. Setting up a functional test is done by placing a Functional Test Actor in a Level. That actor can then be scripted to run a set of tests by the Level Script in the Level Blueprint.
Related Unreal document: https://docs.unrealengine.com/5.2/en-US/functional-testing-in-unreal-engine/.
Create a test case
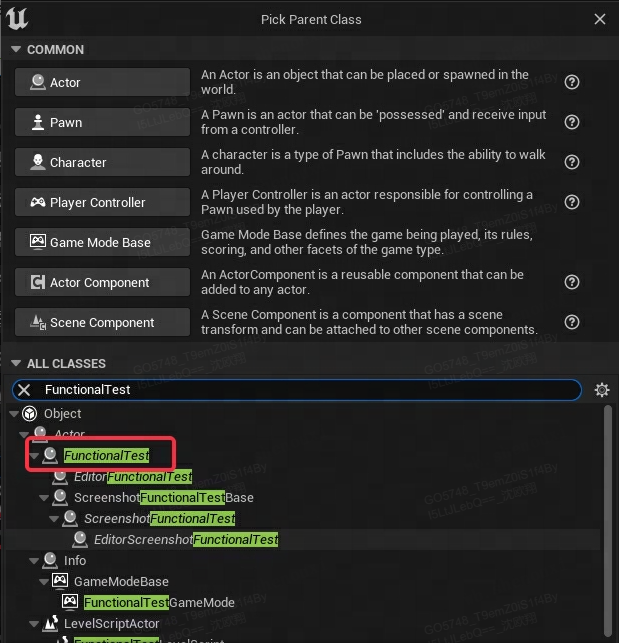
UAT test cases need to inherit the class FunctionalTest.
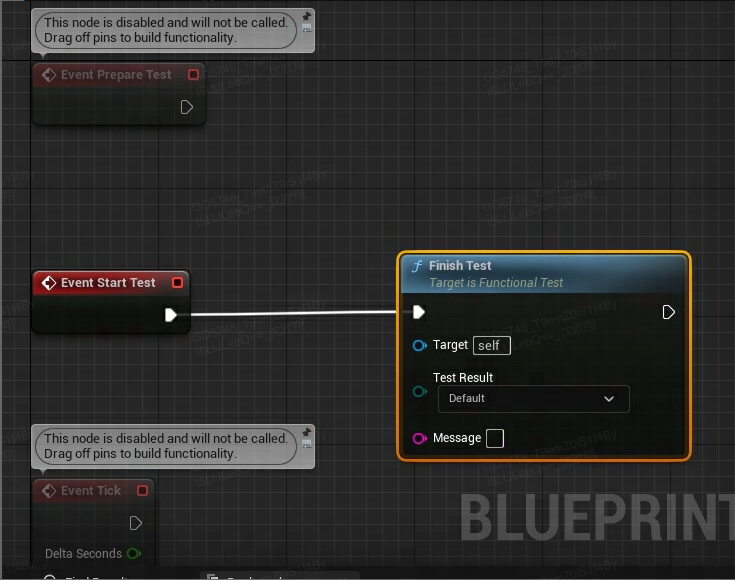
After the inheritance, we can start writing the test logic in blueprint. In the “Event Prepare Test” event, we need to initialize the variables required for the test. The “Event Start Test” event will execute the test logic, and the “Finish Test” event will determine whether the test is passed or failed.
Finally, we just need to put the written test case to the desired testing scenarios.
Run a test case
Currently, there are two ways to run UAT tests:
Run it from the Session Frontend :
Launch the Session Frontend (Tools->Session Frontend).
Go to the “Automation” tab, select the applicable test machine and test case (which is “Project.Maps.Pie” in this case), then click “Start Tests”.
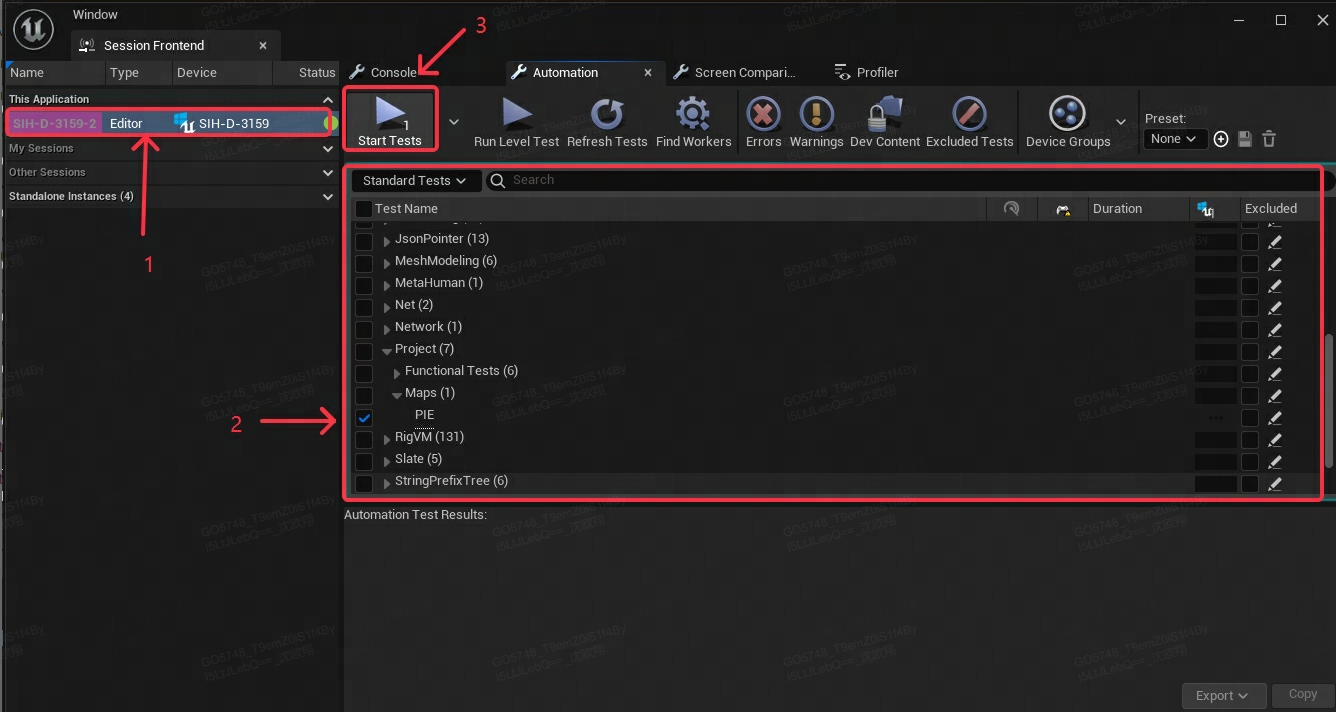
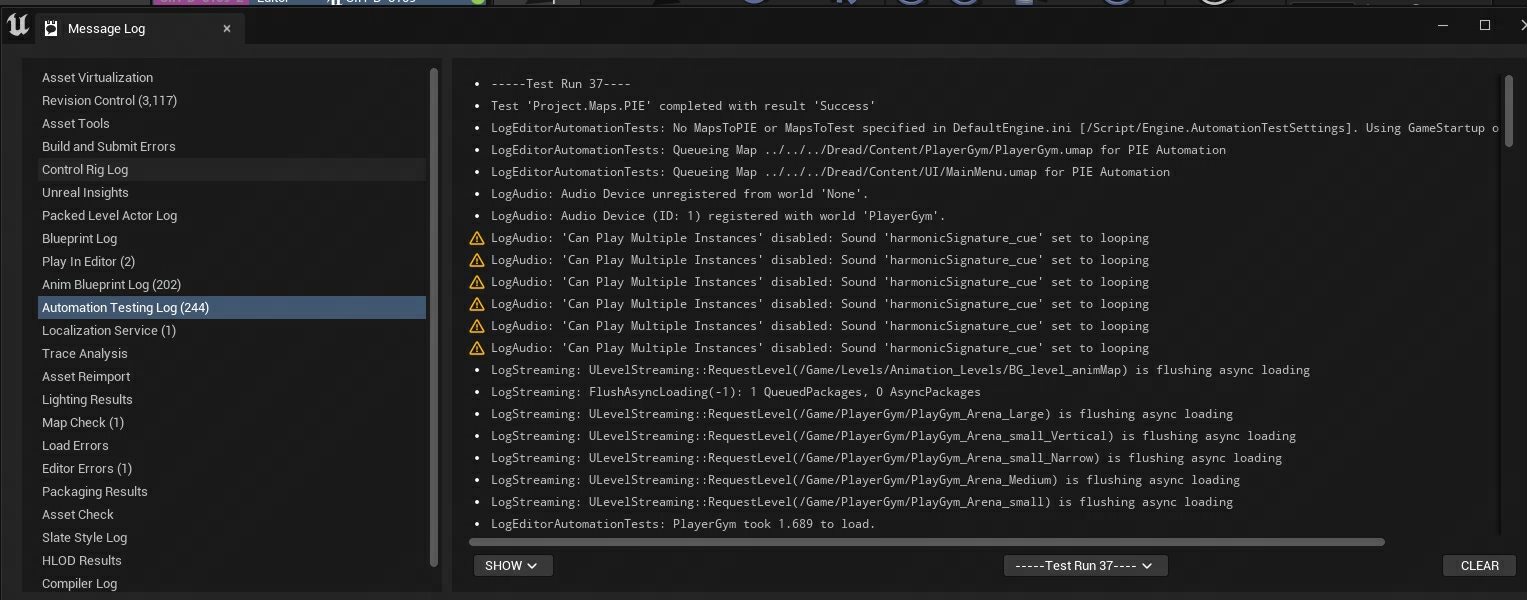
View the test result.
Run it with Command Line
    {EnginePath}\Engine\Binaries\Win64\UnrealEditor-Cmd.exe ^
    {ProjectPath}\StackOBot.uproject ^
    -ExecCmds="Automation RunTests Project.Maps.PIE" ^
    -unattended ^
    -testexit="Automation Test Queue Empty" ^
    -log
Upload cases to Perforce
Test the test case locally and upload it to Perforce.
After the relevant content of the test case is uploaded to Perforce, it will be automatically synchronized to AutoEase.